This blog will walk you through on how to configure Storage Spaces for Azure Virtual Machine (Windows). Finally, we get to see some IOPS benchmarks.
Each data disk (Standard Storage Account) has about 500 IOPS. In this example, we are going to create a Storage Space by attaching 4 data disks to a Standard A2 sized Azure VM. In theory, this should increase the IOPS to 2k. (500 x 4 = 2000)
Configuring Storage Spaces for Azure windows VM
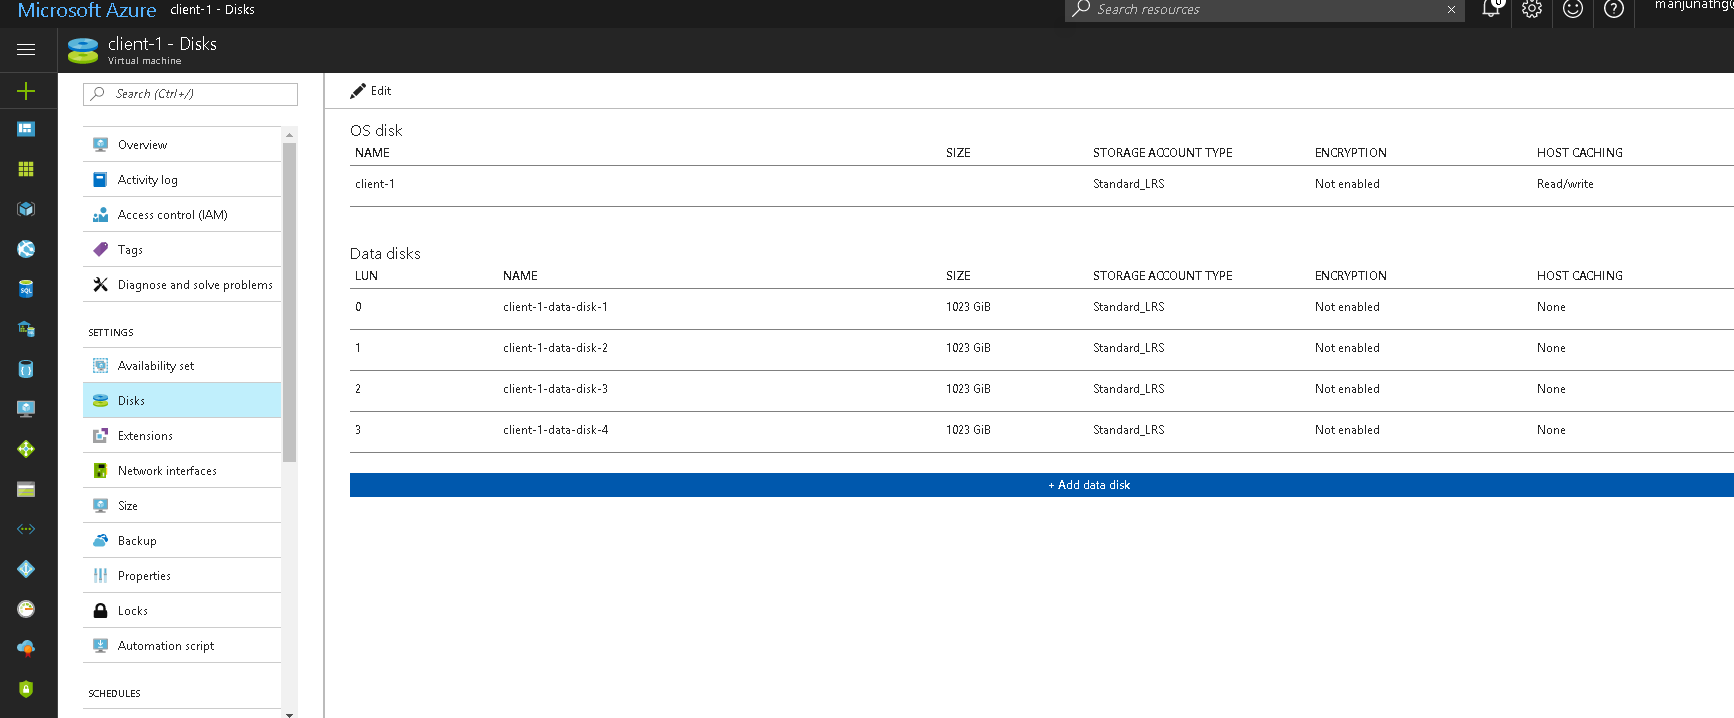
Step 1: Attach four data disks to your virtual machine.
From the azure portal, select your virtual machine >> Click on “Disks” >> click on the “+ Add data disk” >> Fill out the details accordingly >> Save the disk.

Repeat this process 3 more times and we will have 4 data disks attached to our virtual machine as shown below:
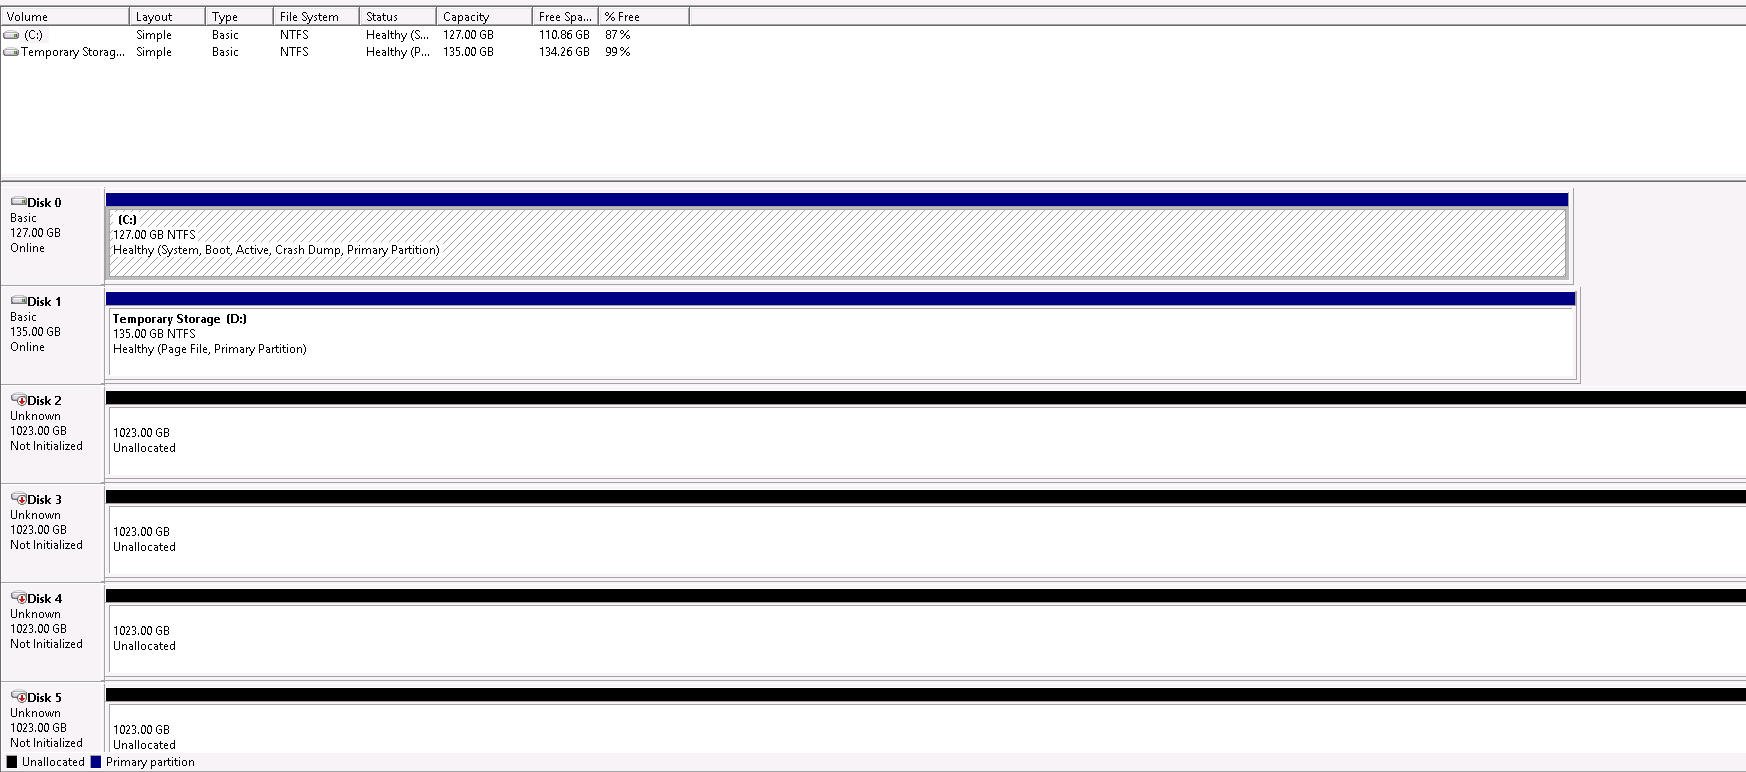
Inside the VM, we can see the disks attached:
Step 2: Login to the virtual machine and run the following PowerShell cmdlets. This will configure Storage Space and will create a drive for you.
In our example, we will configure one volume. Hence, only one storage pool. If you are implementing SQL Server or any other architecture, you may need more than one storage pool.
New-StoragePool –FriendlyName StoragePool1 –StorageSubsystemFriendlyName “Storage Spaces*” -PhysicalDisks (Get-PhysicalDisk -CanPool $True)
|
Retrieve the disks from the pool and store it in a variable:
$Disks = Get-StoragePool –FriendlyName StoragePool1 -IsPrimordial $False | Get-PhysicalDisk
|
Create a new virtual disk using all the space available from the storage pool using a Simple configuration. The interleave is set to 256KB. We are also setting the number of columns to be equal to the number of disks in the pool
New-VirtualDisk –FriendlyName VirtualDisk1 -ResiliencySettingName Simple –NumberOfColumns $Disks.Count –UseMaximumSize –Interleave 256KB -StoragePoolFriendlyName StoragePool1
|
Format the disk with NTFS filesystem and a 64KB allocation unit size.
Get-VirtualDisk –FriendlyName VirtualDisk1 | Get-Disk | Initialize-Disk –Passthru | New-Partition –AssignDriveLetter –UseMaximumSize | Format-Volume –AllocationUnitSize 64KB
|
Below is a snippet of the PowerShell console after executing the above cmdlets.
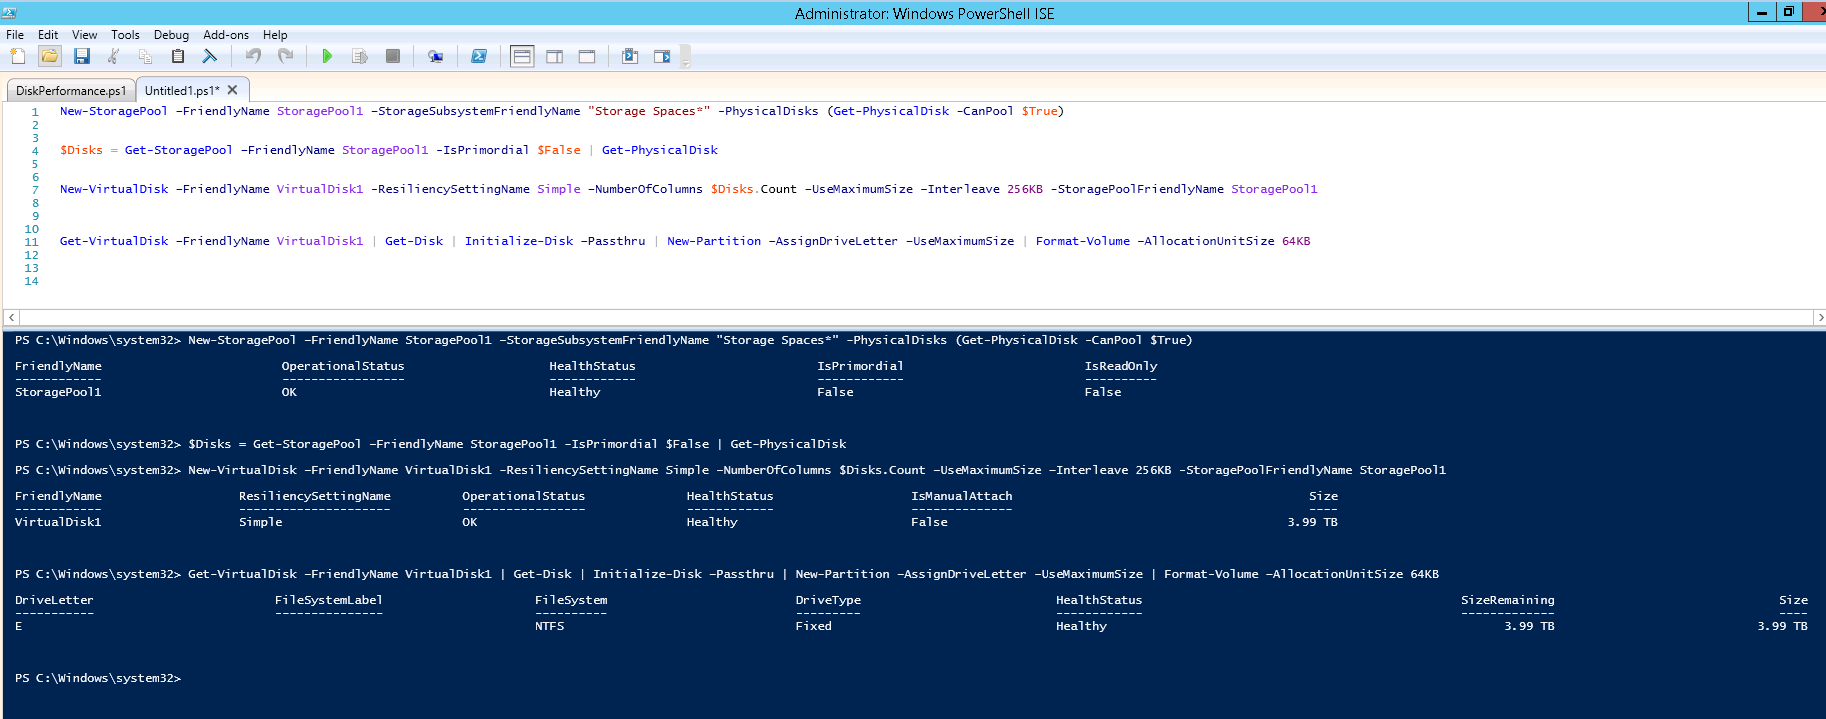
Finally, we can see the drive. A drive named “E” will be created with a free space of ~4TB.

Benchmark Tests
Obviously, this works. However, I have run IOPS test to have a visual. You may choose any standard benchmark testing tools. To keep it simple, I have used a PowerShell script authored by Mikael Nystrom, Microsoft MVP. This script is a wrapper to the SQLIO.exe. You may download the PowerShell script and SQLIO.exe file, HERE.
Download the archive file to your local system and copy it to the server. Extract the contents to any folder.
Below is a sample script to estimate IOPS:
.\DiskPerformance.ps1 -TestFileName test.dat –TestFileSizeInGB 1 -TestFilepath F:\temp -TestMode Get-SmallIO -FastMode True -RemoveTestFile True -OutputFormat Out-GridView
Feel free to tweak the parameter values for different results.
Explaination of parameters:
-TestFileName test.dat
The name of the file, it will create the file using FSUTIL, but it checks if it exists and if it does it stops, you can override that with the –RemoveTestFile True
–TestFileSizeInGB 1
Size of the file, it has fixed values, use the TAB key to flip through them
-TestFilepath C:\VMs
The folder can also be an UNC path, it will create the folder so it does not need to exist.
-TestMode Get-SmallIO
There is too test modes Get-LargeIO or Get-SmallIO, you use Get-LargeIO to measure the transfer rate and you use Get-SmallIO to measure IOPS
-FastMode True
Fast mode true runs each test for just 10 seconds, it gives you a hint, if you don’t set it or set it to false it will run for 60 sec (it will take a break for 10 sec between each run)
-RemoveTestFile True
Removes the test file if it exists
-OutputFormat Out-GridView
Choose between Out-Gridview or Format-Table
IOPS for C drive on Azure VM [OS Disk]:

IOPS for D drive on Azure VM [Temporary Disk]:

IOPS for E drive on Azure VM [Standard data disk]:

IOPS for F drive on Azure VM [Storage Spaces]:

We can use this storage strategy when we have a small amount of data but the IOPS requirement is huge.
Example scenario:
You have 500GB of data, and the IOPS for that data exceeds 1K. Storing 500GB of data in one data disk will create IOPS problems since each data disk has a 500 IOPS limit. But, if we combine 4 disks and create a storage space, the IOPS will increase to ~2k [we have to consider latency etc., to have a correct figure]. Since we are using the same Standard A2 virtual machine and Azure charges for the overall data and not per disk, the pricing will be the same.