azure virtual machine

Powershell – Script to check the Azure VHD lease status

The common miss conception while working with Azure compute is to assume that no billing charges will be incurred once the Azure VM is deleted. This is true to certain extent. Because, once you delete the VM, the billing for compute hours will stop. But the billing continues for the VHD (which was previously associated with the VM) that is still available in the Azure storage account.

As the title of the post states – the idea behind this script is to get a list of “Lease status” of Azure VHDs from all the storage accounts under your subscription. This is particularly helpful to delete any unused VHDs. Thus saving a lot of money for your organization.

The complete script is uploaded in the Microsoft Script Center. Use the below link to download it.

Check the Lease status of VHDs


Advertisement

Powershell – Script to Monitor Azure VM Availabilty

The idea behind writing this script is to have an automated solution to monitor availability of any Azure VMs. The script fetches the current server status, saves it in an Azure Table. Each script execution is one poll. So the second time the script runs, it fetches the current server status of VMs and then compares it to the previous value. If there are any changes to the server status during polling, such server details will be written to a hash table. Finally the details of the servers can be sent to an email.

Since we are monitoring the VM status from “RUNNING” to “VM STOPPED”, this will eliminate the scenarios, where VMs are stopped manually or as per a scheduled shutdown automation script. In these cases the VM status changes from “RUNNING” to “VM DEALLOCATED”.

Feel free to customize the script to add logic if you want to monitor the status of De-allocated VMs as well.

This script uses SendGrid as an email server. Feel free to add your SMTP address if you have one.

This script is useful when you do not yet have a fully automated monitoring like Nagios/OMS. Maybe you have a couple of servers that you want to monitor and do not want to spend more money on a custom monitoring. Simply create a runbook using this script as a baseline and schedule it in the Azure Automation Account.

The script is uploaded to the Microsoft Script Center. Please download it using the below link:

Monitor Azure VM Availability

Azure – Unable to ping Azure Virtual Machine from outside Azure

You buy a new Azure subscription, spin up an Azure Virtual Machine. Now you want to test if it is working or not. So, you pull up the infamous Command Prompt (or powershell) and Ping the VIP (Virtual/Public IP) of your Azure Virtual Machine. Wola!! The ping fails with 100% loss. But you can see that the Azure Portal shows that your virtual machine is up and running. To double check, you even RDP to your VM and it is all good. This is one of the many situations where the Azure new comers get confused. Let me break down this for you:-

The explanation for this behaviour is that the good old, Windows Ping.exe uses ICMP protocol to communicate. But the Azure Load Balancer does not support ICMP protocol when a connection is being made from external source to Azure. This means, your local computer will not be able to “Ping” (probing using Ping.exe) the Azure virtual Machines. However Azure Load Balancer allows ICMP protocol inside the azure (internally). This means, two Azure virtual machines are able to talk to each other.

The solution is to ping the port of your Virtual Machine.

Example: Ping xx.xx.xx.xx:1234

Since Ping.exe does not support probing the port, we have to use the other tools like PSPing, TCPPing etc, to achieve this.

This explains most of it. I am going to demonstrate whatever I just explained.

Below is the details of my virtual machine:

VM Details

When I ping the VIP – 13.76.247.67, using the default Ping.exe. You can observe that we end up having 100% packet loss.

packet_loss

This behaviour is because the Azure Load Balancer does not allow ICMP communication between Azure and the external source. And Microsoft’s Ping.exe uses ICMP protocol.

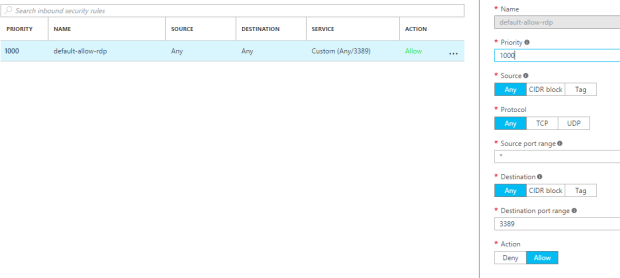
The solution is to use PSPing (among many other options), and ping the port of the Virtual Machine. Please note that you have to add relevant entry in the NSG (Network Security Group) to allow incoming traffic to your Virtual Machine.

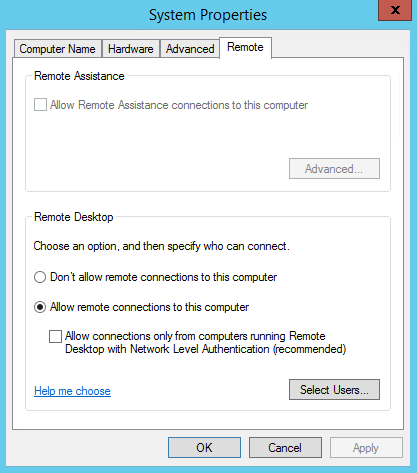
Since this is just a Demo, I have allowed all the traffic to my Virtual Machine via the port 3389. You have to use appropriate NSG and ACLs to your Virtual Machine and Subnet, in your production environment. 

NSG_Allow_All

PSPing.exe comes with a bundle – PSTools. This toolset can be downloaded here.

Copy PsPing onto your executable path. Typing “psping” displays its usage syntax.

psping_syntax

Note: If you are using the PSPing tool for the first time, you may have to agree to the terms and conditions before using it.

Since I have my port – 3389 opened for all incoming traffic. I will go ahead and use the PSPing tool to ping the port from my local computer. And as you can see it works like a charm !!

ping_success

Finally, note that you can ping only to the port for which you have enabled the incoming traffic. Since I have not enabled port 80, I expect the packets to be dropped.

packet_loss_wrong_port

Azure – RDP from Linux box to Azure Virtual Machine (Windows Server)

This topic is pretty straight forward. Once you have your Azure Windows Server spun up, you can connect to it using RDP tool if your source is a Windows operating System.

But when you are in Linux the story is different, as it does not have the RDP tool. We have plenty of open source tools that we can use to make a connection from Linux Box to Windows Server.

Since we are discussing about Azure, I am using an Azure VM. Below is the details of that machine:

VM Details

We are going to use the “RDesktop” tool to connect from Linux to Windows. Installation of RDesktop is pretty simple. You may google/bing for assistance, or check this link for the complete installation guide in RedHat/CentOS/Fedora Operating System.

Once you have your RDesktop setup. Enable the RDP port- 3389 in your Azure virtual Machine. You can achieve this by adding “Inbound Security Rules” into your Network Security Group, via the Azure Portal.

For demo purposes, I am allowing all incoming traffic for the port – 3389. However, incase of production environment, you may have to provide appropriate rules for your NSG (Network Security Group) and ACLs (Access Control List) for better security.

NSG_Allow_All

Once RDesktop and RDP ports are configured. You may now run the RDesktop command to connect to your Virtual Machine.

Command: sudo rdesktop <IP Address>

rdesktop_fail

As you can see in the above screenshot, the connection fails. This is an expected behavior, because by default the RDP connection is set to “Allow connections only from computers running Remote Desktop with Network Level Authentication”

NLA_Enabled

In order to connect from Linux machines, we have to disable the NLA.

NLA_Disabled

Now give it another try, the remote connection works like a charm !

rdesktop_success